...
To import user-defined fields that are not the default set of fields offered by Logbook Pro, you must first go to Options...Custom and create the fields. Once the custom fields have been defined, they will be available for import targets.


Figure 1. Import Wizard Step 1
Figure 1 above shows the first screen of the Import Wizard. Choose the file containing the logbook data for import and the options to Backup prior to conducting the transfer (recommended) and the Append or Replace option. Tell Logbook Pro which delimiter is used in the text data file, if not recognized automatically. Click Next to continue with the import process.

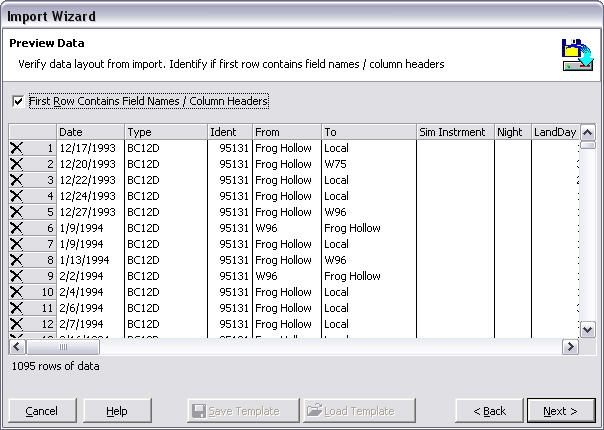
Figure 2. Import Wizard Step 2
The second step of the import process is to verify the data is ready for analysis for the import engine. If the first row contains the column headers, as is shown above, click the checkbox "First Row Contains..." to avoid import errors. If a row is invalid or should not be imported, click the ![]() at the far left to remove the row from the import available data. Click next to begin assigning the columns to target fields.
at the far left to remove the row from the import available data. Click next to begin assigning the columns to target fields.

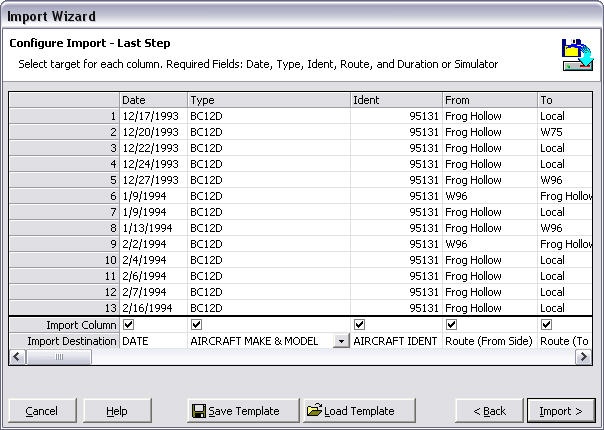
Figure 3. Import Wizard Step 3
...