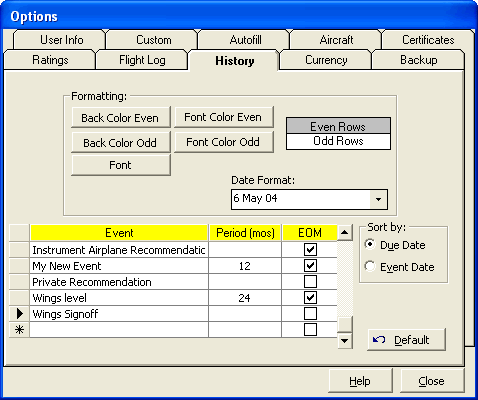

Figure 1. History Configuration
Basic formatting is offered in all data entry areas, as seen by the options above. An example is shown on the right of the configuration of the color and font settings as well as the date format selection for any columns containing date information. Click the buttons to change the color scheme or font settings. Select a date format from the available options in the drop down list. To restore to the default settings, click the Default button in the lower right.
A History Event is any event that has an expiration. Medicals, Biennials, Check flights, etc. Use the history area to keep information for expiring information. Events must first be defined in the Options...History area before it can be used from the History data entry area. The option to add event exists on the History Sub-Toolbar to bring up the Options dialog for adding new events.
Add events as desired, Logbook Pro ships with the basic events included, such as Medicals and Biennial. Add an event by clicking on the bottom row and entering the information for a new History Event, check the EOM (End-of-Month) checkbox for any events that carry forward to the last day of the calendar month for expiration.
To remove an event, click the row selector to the far left of the row and hit the Delete key on the keyboard, or select the field and right-click, selecting the appropriate option on the popup menu.
The History area offers two sort options, the ability to sort by the Due Date column or the Event Date column. Select the default sort option from the radio buttons on the right lower side of the Options...History area. This is also configurable within the History area using the History Sub-Toolbar.